

3.9
Owner's of the Breville Coffee Grinder THE SMART GRINDER gave it a score of 3.9 out of 5. Here's how the scores stacked up:

19
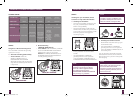
CARE & CLEANING
CARE & CLEANING
for your Breville Smart Grinder™
1. Unplug power cord from power outlet
before cleaning.
2. Wash the Grinds Container and Lid,
Bean Hopper and Lid and Portafilter
Cradles in warm soapy water, rinse and
dry thoroughly.
3. Wipe and polish exterior of the grinder
with a soft damp cloth.
4. Wipe the LCD screen with a soft damp
cloth. Apply cleanser to the cloth and
not the LCD surface. Cleaning with dry
cloth or abrasive cleaners may scratch
the surface.
14
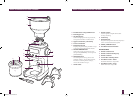
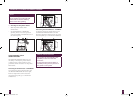
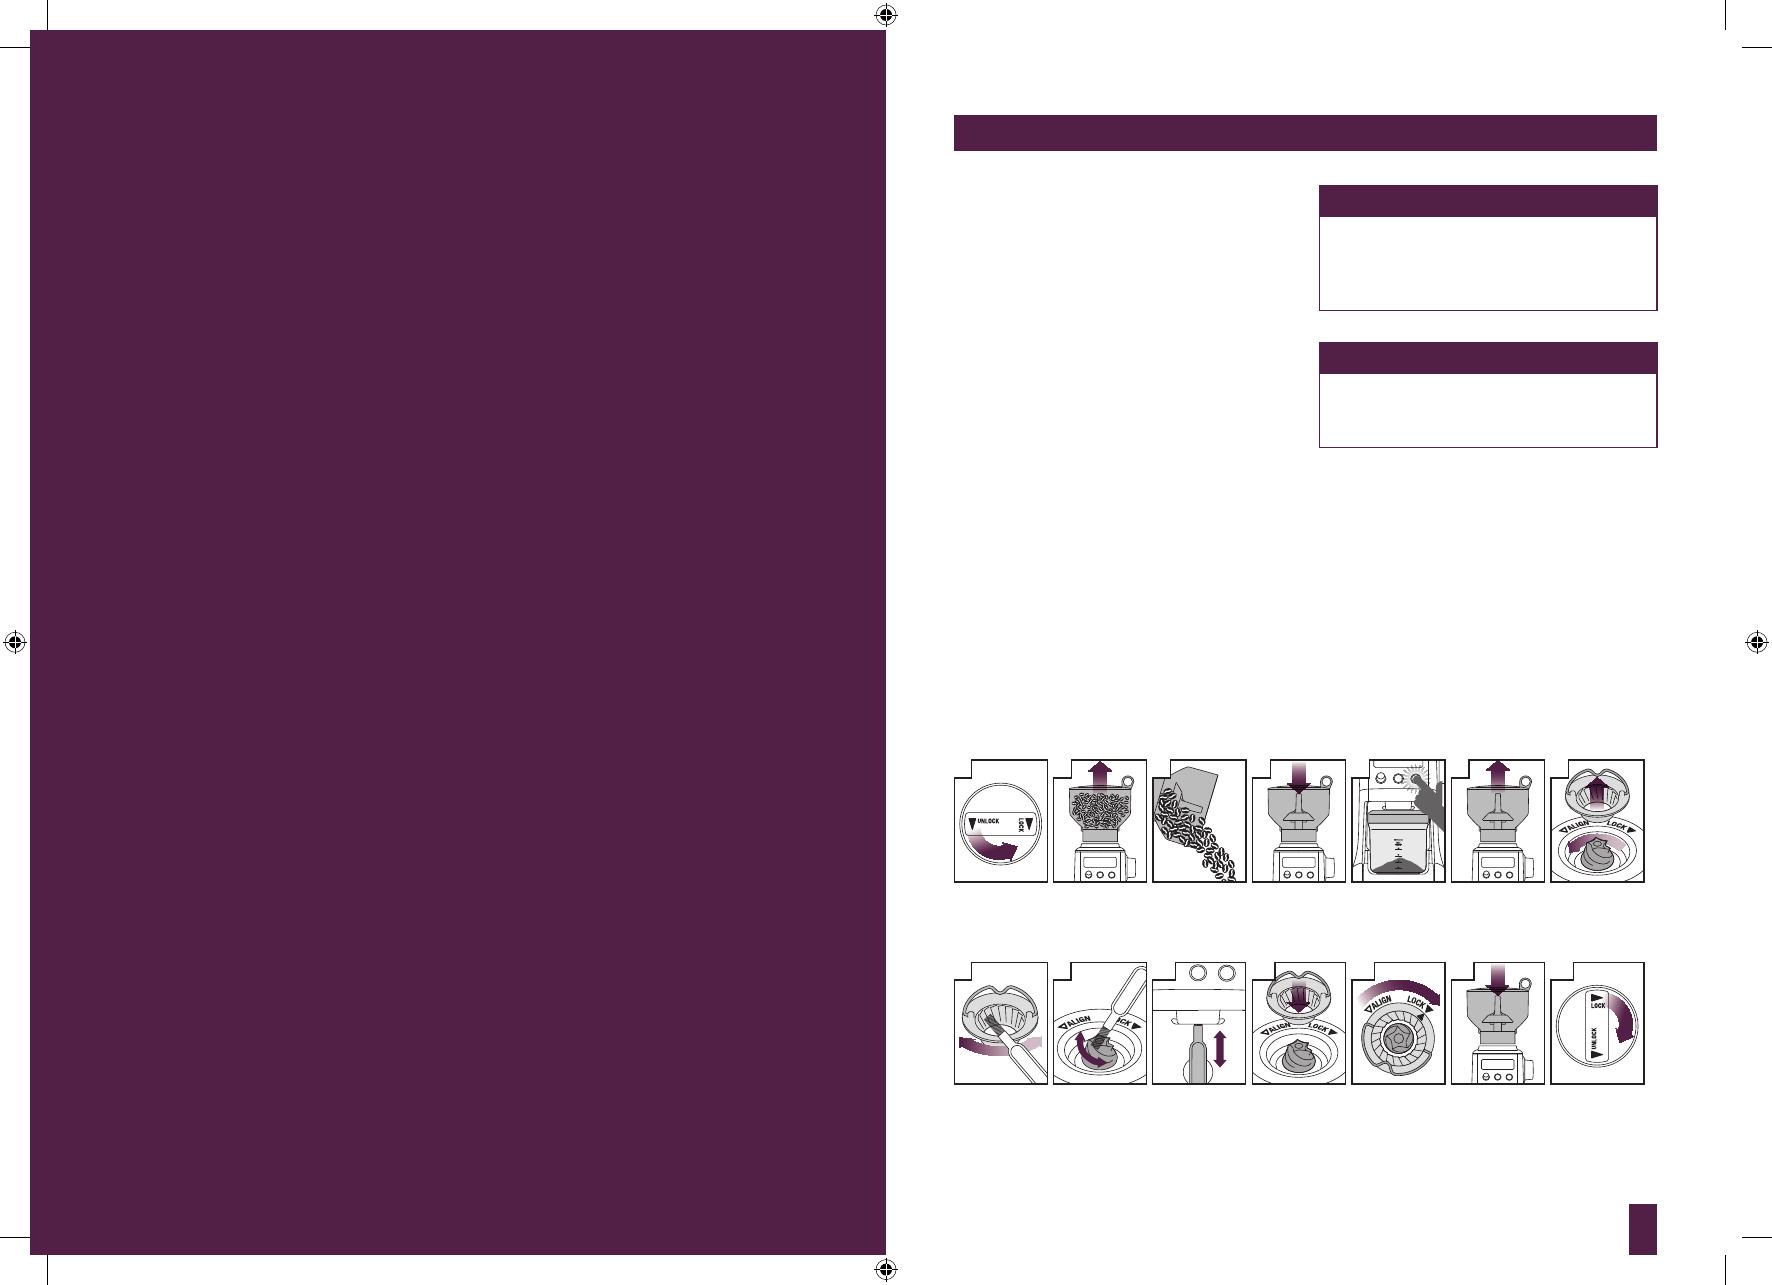
Align Bean
Hopper into
position and lock
Remove beans Run grinder
until empty
Remove Bean
Hopper
Remove Upper
Burr
Unlock Bean
Hopper
1 3 4 5 6 7
Clean Lower
Burr with
Cleaning Brush
Clean Grind
Outlet with
Cleaning Brush
Clean Upper
Burr with
Cleaning Brush
8 99 10
Push Upper
Burr firmly into
position
11
Lock Upper Burr
12
Align Bean
Hopper into
position
13
Lock Bean
Hopper
Remove beans
Remove Bean
Hopper
2
NOTE
Do do not use alkaline or abrasive
cleaning agents, steel wool or scouring
pads, as these can damage the stainless
steel surface and LCD screen.
NOTE
We recommend you do not clean
any grinder parts or accessories in
the dishwasher.
CLEANING CONICAL BURRS
Regular cleaning helps the burrs achieve consistent grinding results which is especially
important when grinding for espresso coffee.
Dark oily beans require that the Grind Outlet be cleaned more often than medium brown
non-oily beans. Coffee oils can deposit inside the Grind Outlet and become rancid.
BCG800XL_IB_A10.indd 18-19 25/06/10 2:04 PM


Find Your Products By Category
Please Login
