
5.0
Owner's of the Yamaha Indoor Furnishings SPMK30 gave it a score of 5.0 out of 5. Here's how the scores stacked up:

INSTALLATION PROCEDURE
En 6
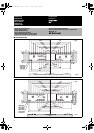
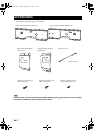
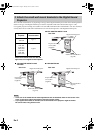
The small wall mount brackets vary depending on the type of the Digital Sound Projector. Refer to the following table for
details on the type of the Digital Sound Projector and the compatible small wall mound brackets (Type A or B).
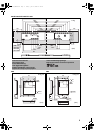
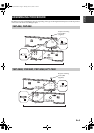
Use supplied projector mounting screws (M6 x 4 for YSP-4000, YSP-40D or HTY-7040 and M4 x 8 for other models) to
securely attach the two small wall mount brackets to the rear left and right sides of the Digital Sound Projector.
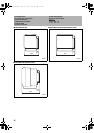
• In the unit of the model that the metal apparatuses are not attached, there are felt covers in the
holes. In this case, tighten the screws to puncture the felt covers.
• If you tighten the screws on the slant, the screw threads in the projector might be broken.
Be careful when using electric tools.
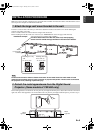
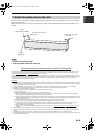
3 Attach the small wall mount brackets to the Digital Sound
Projector.
Projector mounting
screws (M4)
(supplied)
Digital Sound Projector
Small wall mount bracket
(Type A)
Digital Sound
Projector
Small wall
mount bracket
YSP-800
YSP-900
Type A
YSP-3000
YSP-30D
YSP-3050
HTY-7030
YSP-4000
YSP-40D
HTY-7040
Type B
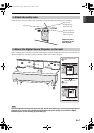
Attach the brackets to the rear left and
right sides of the Digital Sound Projector.
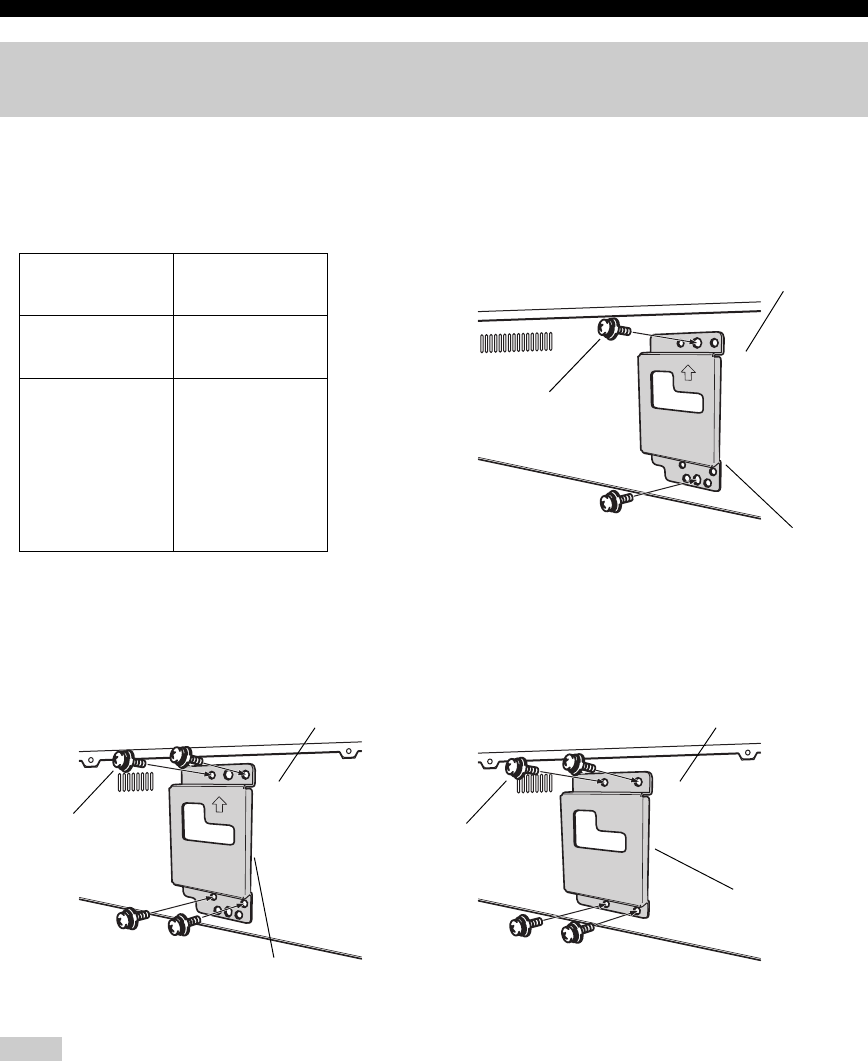
■ YSP-800/YSP-900
■ YSP-4000/YSP-40D/HTY-7040
Projector mounting
screws (M6)
(supplied)
Digital Sound Projector
Small wall mount bracket
(Type B)
Rear View
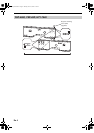
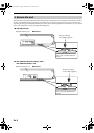
■ YSP-3000/YSP-30D/HTY-7030/
YSP-3050
Rear View Rear View
Digital Sound Projector
Projector mounting
screws (M4)
(supplied)
Small wall mount bracket
(Type B)
Notes
01_EN_SPM-K30.fm Page 6 Monday, June 18, 2007 5:59 PM


Find Your Products By Category
Please Login
